This guide provides comprehensive instructions for setting up and using Wildgame Innovations trail cameras‚ covering installation‚ configuration‚ and troubleshooting. Learn about battery installation‚ mounting‚ and key features to maximize your wildlife monitoring experience. Discover tips for optimal camera placement and understand the 365-day warranty for trouble-free operation. Perfect for hunters and outdoor enthusiasts seeking reliable trail camera performance.
Overview of Wildgame Innovations Trail Cameras
Wildgame Innovations offers high-quality trail cameras designed for wildlife monitoring and outdoor enthusiasts. Their models‚ such as the Terra Extreme and Razor‚ feature advanced imaging‚ durability‚ and user-friendly interfaces. These cameras are known for long battery life‚ weather-resistant designs‚ and compatibility with SD cards for storage. With a focus on reliability and innovation‚ Wildgame Innovations provides tools for hunters and nature observers to capture wildlife effectively. Their products are backed by a 365-day limited warranty for added peace of mind.
Importance of Proper Setup and Configuration
Proper setup and configuration are crucial for optimal performance of Wildgame Innovations trail cameras. Correct installation ensures reliable functionality‚ while accurate settings enhance image quality and battery life. SD card formatting and date/time settings prevent errors‚ ensuring smooth operation. Customizing modes like still photos or video captures aligns the camera to your needs. Ignoring setup steps can lead to poor results‚ making initial configuration essential for maximizing your wildlife monitoring experience and capturing high-quality images consistently.

Key Features of Wildgame Innovations Trail Cameras
Wildgame Innovations trail cameras offer high-quality image and video capture‚ long battery life‚ and weather-resistant designs. They also feature compatibility with SD cards and external power options for reliable performance in the field.
High-Quality Image and Video Capture
Wildgame Innovations trail cameras deliver crisp‚ clear images and high-resolution video capture‚ ensuring detailed wildlife observations. With excellent low-light performance‚ they excel in various lighting conditions‚ capturing vibrant colors during the day and sharp images at night. The cameras also feature fast trigger speeds to freeze motion‚ reducing blur. Whether you’re monitoring deer or smaller wildlife‚ these cameras provide reliable and high-quality visuals‚ making them ideal for scouting and outdoor surveillance. Their ability to switch between still photos and video modes offers flexibility for different monitoring needs‚ ensuring you never miss a moment in the field.
Long Battery Life and Power Management
Wildgame Innovations trail cameras are designed for long battery life‚ with some models lasting up to 12 months on a single set of batteries. They support high-capacity battery packs and are compatible with external power sources‚ ensuring continuous operation. The cameras feature power-saving modes and low battery indicators to alert users when replacements are needed; This ensures uninterrupted wildlife monitoring and minimizes maintenance‚ making them reliable for extended outdoor use in remote areas.
Weather-Resistant Design
Wildgame Innovations trail cameras feature a rugged‚ weather-resistant design built to withstand harsh outdoor conditions‚ including rain‚ snow‚ and extreme temperatures. The camera’s housing is sealed to protect internal components from moisture and dust‚ ensuring reliable performance in various environments. This durable construction allows for long-term use in the field without compromising functionality‚ making it ideal for year-round wildlife monitoring in challenging weather conditions.
Compatibility with SD Cards and External Power
Wildgame Innovations trail cameras are compatible with standard SD cards‚ supporting up to 32GB for ample storage. They also feature an external power port‚ allowing the use of a 6-volt battery accessory for extended operation. The weather-resistant cover protects the port‚ ensuring reliability in outdoor conditions. This versatile power system ensures uninterrupted monitoring‚ making it ideal for long-term wildlife surveillance without frequent battery replacements.

Installation and Mounting
Securely attach your Wildgame Innovations trail camera using the strap and clip system. Slide the strap through the camera’s slots and reattach the clip for a firm hold. Position the camera on a tree to optimize wildlife capture‚ ensuring the lens faces the desired area for clear imagery.
Mounting the Camera on a Tree
To mount your Wildgame Innovations trail camera on a tree‚ first remove the clip from one end of the strap and slide it through the slots on the camera’s back. Reattach the clip to secure the strap tightly around the tree trunk. Position the camera facing the desired wildlife area‚ ensuring it’s level and at an optimal height for clear imagery. Adjust the strap for a snug fit to prevent movement without harming the tree. This setup ensures reliable and stable performance for capturing wildlife activity effectively.
Strap and Clip System for Secure Attachment
The strap and clip system ensures a secure and durable attachment of your Wildgame Innovations trail camera to a tree. Simply slide the adjustable strap through the camera’s back slots and tighten it around the trunk. The clip securely fastens the strap in place‚ preventing any movement or loosening over time. This system is designed for easy installation and removal‚ allowing you to position the camera at the optimal height and angle for capturing wildlife effectively without damaging the tree or camera.
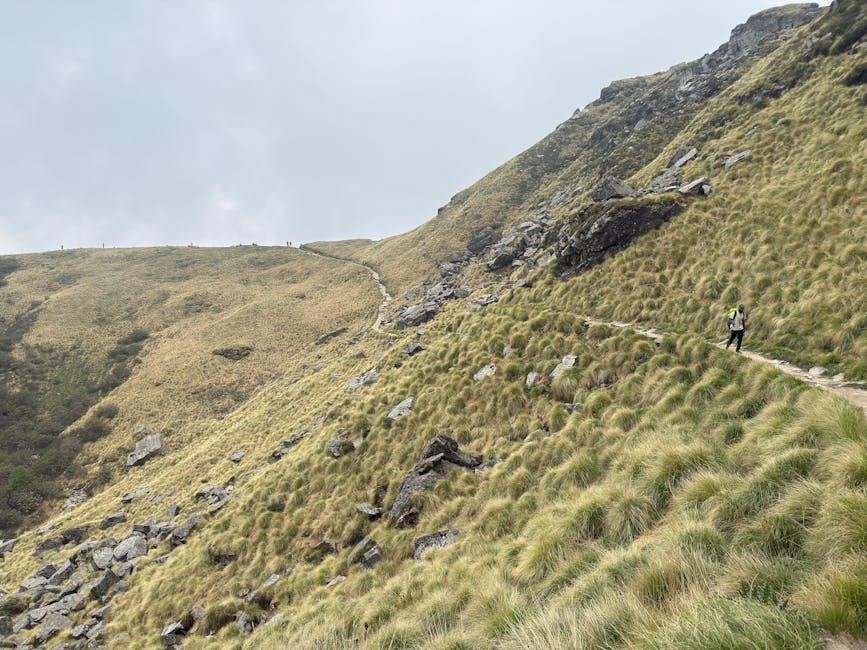
Positioning for Optimal Wildlife Capture
Mount the camera at a height of 3 to 4 feet to align with the average height of wildlife. Facing the camera north or east minimizes glare from the sun. Ensure the area in front of the camera is clear of branches or debris. Place the camera near frequently used trails‚ feeding areas‚ or water sources to maximize the capture of wildlife activity. Adjust the angle to cover the desired field of view effectively.

Battery Installation
Insert batteries with correct polarity‚ ensuring positive ends face the marked positive terminals. Use high-quality‚ long-lasting D batteries for optimal performance. An external power option is also available.
Correct Battery Polarity and Placement
Ensure batteries are inserted with correct polarity‚ aligning positive terminals with marked positive slots. Incorrect placement can damage the camera. Use high-quality D batteries for reliable power. Align negative ends with negative terminals to avoid short circuits. Double-check the manual for specific polarity markings. Proper placement ensures optimal performance and prevents device malfunction. Always verify battery orientation before closing the compartment for safe operation. This step is crucial for maintaining your trail camera’s functionality and longevity. External power options are also available for extended use.
Recommended Battery Type and Brand
Wildgame Innovations trail cameras require high-quality D batteries for optimal performance. Recommended brands include Energizer or Duracell for reliable power. Use alkaline or lithium batteries for extended longevity‚ especially in cold conditions. Avoid using rechargeable batteries unless specified. For external power‚ a 6-volt battery accessory is available. Ensure batteries are fresh to prevent device malfunction. Always check the manual for specific recommendations to maximize your camera’s efficiency and durability in the field. Proper battery selection ensures consistent performance and clear image capture.
Powering On and Initial Setup
Insert batteries with correct polarity‚ then power on the camera using the power button. Follow on-screen prompts to set date‚ time‚ and mode. Ensure the SD card is properly inserted and formatted. Test the camera by taking a photo or video to confirm functionality. Review settings in the menu to customize capture modes‚ sensitivity‚ and intervals. Save changes before exiting. Proper initial setup ensures optimal performance and accurate wildlife monitoring. Refer to the manual for detailed guidance.
Basic Setup and Configuration
Insert the SD card and format it for proper use. Set the date and time accurately. Test the camera to ensure functionality. Refer to the manual for detailed guidance. Proper configuration ensures seamless operation and high-quality results.
Inserting the SD Card
Power off the camera and locate the SD card slot‚ typically on the back or bottom. Insert the SD card with the label facing outward. Ensure the camera is off to avoid issues. Turn the camera on and navigate to the menu to format the SD card for proper use. Formatting ensures the camera can read and write files correctly. Follow these steps to secure your SD card and enable optimal functionality. Proper insertion and formatting are essential for reliable performance.
Formatting the SD Card for Proper Use
Turn on the camera and navigate to the menu. Select the Format option to erase all data on the SD card. This ensures compatibility and optimal performance. Formatting prepares the card for storing photos and videos correctly. Always format the SD card in the camera‚ not on a computer‚ to avoid potential issues. Confirm the format process to complete the setup. This step is crucial for proper functionality and data storage.
Setting the Date and Time
Access the camera menu and select the Date and Time option. Use the UP and DOWN arrows to adjust the month‚ day‚ year‚ hour‚ and minute. After setting‚ select Save to confirm. Ensure the date and time are accurate for proper timestamping of photos and videos. This feature helps in tracking wildlife activity effectively. Always confirm the settings before exiting the menu to ensure accuracy.
Capture Modes and Settings
Explore the different capture modes and settings available on your Wildgame Innovations trail camera. Still Photo Mode captures individual images‚ while Video Mode records clips. Adjust sensitivity and trigger speed to customize detection. These settings help optimize wildlife monitoring and ensure you never miss a moment.
Still Photo Mode

In Still Photo Mode‚ the Wildgame Innovations trail camera captures high-quality images of wildlife. Users can adjust settings like resolution and timing to optimize results. Trigger speed ensures quick activation‚ minimizing blur. This mode is ideal for monitoring game patterns and identifying species. Memory management is crucial‚ as high-resolution photos consume more storage. Regularly check and format the SD card to ensure smooth operation and avoid errors. This mode is user-friendly and offers reliable performance for outdoor enthusiasts.
Video Mode and Its Applications
The Video Mode on Wildgame Innovations trail cameras captures extended wildlife behavior‚ ideal for hunters and researchers. It allows for high-resolution video recording‚ providing detailed insights into animal activity. Users can adjust settings like frame rate and video duration to customize recordings. This mode is particularly useful for identifying patterns in game movement. For longer sessions‚ an external power source is recommended to ensure continuous operation without interruptions.
Adjusting Sensitivity and Trigger Speed
Sensitivity controls how easily the camera detects motion‚ while trigger speed determines how quickly it captures images after detection. Adjusting these settings ensures optimal performance for your needs. Lower sensitivity reduces false triggers‚ while higher sensitivity captures more movement. Faster trigger speeds are ideal for fast-moving wildlife‚ minimizing blur. Experiment with settings to balance detection accuracy and image clarity for reliable wildlife monitoring and clear results. Proper adjustment enhances camera efficiency and effectiveness in various environments.
Advanced Settings and Customization
Customize your trail camera with advanced settings like multi-shot modes‚ time stamps‚ and adjustable capture intervals. These features allow tailored functionality for specific wildlife monitoring needs‚ ensuring precise and efficient image capture.
Customizing Capture Intervals
Customizing capture intervals allows you to set the time between photos or videos‚ optimizing monitoring without unnecessary storage use. Adjust intervals from seconds to minutes‚ depending on wildlife activity. Enable time stamps to track when images are captured. This feature is ideal for observing patterns or behaviors. Combine with multi-shot modes for detailed coverage of movement. Properly setting intervals ensures efficient memory use and captures key moments without overloading the SD card.
Enabling Time Stamps on Photos and Videos
To enable time stamps‚ navigate to the camera’s settings menu and select the time stamp option. This feature adds the date‚ time‚ and camera ID to your photos and videos‚ aiding in tracking wildlife activity. Ensure the camera’s clock is set correctly before enabling this feature. Time stamps are invaluable for monitoring patterns and organizing footage effectively. They also help in identifying specific events‚ making your scouting efforts more precise and efficient. This feature is a must for serious wildlife monitoring.
Configuring Multi-Shot Modes
The multi-shot mode allows the camera to capture multiple photos in quick succession after detecting motion. To enable this‚ access the camera’s settings menu and select multi-shot mode. Choose the number of photos to capture per trigger (typically 1-5) and set the interval between shots (e.g.‚ 5-30 seconds). This feature is ideal for capturing sequences of animal behavior. Ensure your SD card has sufficient storage for the additional photos. This mode enhances wildlife monitoring by providing more detailed activity insights.

Memory and Storage Management
Check available storage on the SD card regularly to avoid running out of space. Delete unwanted photos and videos to free up memory. Always format the SD card properly before reuse for optimal performance.
Checking Available Storage on the SD Card
Turn on the camera and access the menu to view remaining storage. Navigate to the “Memory” or “Storage” section to check available space. Regularly monitor the SD card capacity to ensure enough room for new photos and videos. Low memory can prevent proper function‚ so check storage before extended trips or wildlife monitoring sessions. This step ensures continuous recording without interruptions.
Deleting Unwanted Photos and Videos
Access the camera’s menu and navigate to the “Photos” or “Files” section. Select the “Delete” option to remove unwanted images or videos. Choose specific files or delete all content to free up space. Confirm deletion to avoid accidental loss of data. Regularly cleaning up the SD card ensures optimal performance and prevents storage issues. This step is crucial for maintaining efficient camera operation and data management.
Formatting the SD Card for Reuse
Access the camera’s menu and select the “Format” option to erase all data on the SD card. Confirm the action to begin the formatting process‚ which prepares the card for reuse. This step ensures the card is properly initialized for optimal performance. Always format the SD card in the camera rather than on a computer for compatibility. Regular formatting helps maintain storage efficiency and prevents potential errors during use.

Power and Battery Management
Proper battery placement and external power options ensure optimal performance. Follow guidelines for battery type‚ polarity‚ and maintenance to conserve life and prevent operational issues effectively.
External Power Options
Wildgame Innovations trail cameras offer external power options for extended operation. Use a 6V battery accessory‚ ensuring the weather-resistant cover is open. This feature is ideal for long-term monitoring‚ reducing battery replacements. External power enhances reliability in remote areas. Always follow the manufacturer’s guidelines for compatible accessories to maintain optimal performance and avoid damage. This option is perfect for hunters needing uninterrupted surveillance. Visit the official website for detailed compatibility and setup instructions.
Conserving Battery Life
To conserve battery life‚ use high-quality batteries and adjust settings like trigger sensitivity and photo intervals. Turn off unused features and ensure the camera is powered off when not in use. Regularly check battery levels and replace them as needed. Low battery warnings help prevent unexpected shutdowns. For extended use‚ consider external power sources. Proper maintenance ensures your Wildgame Innovations trail camera operates efficiently‚ capturing wildlife effectively without interruptions.
Monitoring Battery Levels

Regularly monitor battery levels to ensure uninterrupted operation. Check the camera’s indicator or refer to the user manual for guidance. Low battery levels can cause shutdowns‚ affecting functionality. Replace or recharge batteries when levels drop below 20%. Using external power options like solar panels can extend life; Always verify battery status before deploying the camera in the field to avoid missed captures and ensure reliable performance throughout your wildlife monitoring efforts.
Troubleshooting Common Issues
Troubleshoot common issues like blurry photos‚ SD card errors‚ and camera startup problems. Follow these steps to resolve issues quickly and ensure optimal performance.
Blurry or Dark Photos
Blurry or dark photos can occur due to incorrect sensor sensitivity‚ lens obstructions‚ or poor lighting conditions. Ensure the camera is clean and free from debris. Adjust the sensor settings to match your environment. Verify that the SD card is properly formatted and installed. If issues persist‚ check battery levels or try repositioning the camera for better lighting. These steps help resolve common photo quality problems effectively.
SD Card Errors and Solutions
SD card errors can prevent proper photo and video storage. Ensure the SD card is properly formatted as FAT32 and compatible with your camera model. If the camera doesn’t recognize the card‚ try reformatting it in the camera or using a new card. Avoid using high-capacity SD cards that may exceed the camera’s limits. Always insert the SD card correctly and ensure it’s fully seated. Consult the user manual for specific formatting instructions and compatibility guidelines.
Camera Not Turning On
If your Wildgame Innovations trail camera fails to power on‚ first check the battery installation. Ensure batteries are inserted with correct polarity and are not expired. Verify that the power button is functioning properly; If using an external power source‚ confirm the connection is secure. Remove and reinsert the SD card to rule out card-related issues. Reset the camera by turning it off and on again. If the issue persists‚ contact customer support or refer to the warranty for assistance.
Warranty and Support
Your Wildgame Innovations trail camera is backed by a 365-Day Limited Warranty covering parts and labor. Purchases must be made through authorized dealers to validate coverage. For assistance‚ contact customer support directly or visit an authorized service center for prompt resolution of any issues.
Understanding the 365-Day Limited Warranty
The Wildgame Innovations 365-Day Limited Warranty ensures your trail camera is free from defects in materials and workmanship for one year from purchase. Coverage applies only to devices bought through authorized dealers and requires a valid receipt. The warranty does not cover damage from misuse‚ tampering‚ or normal wear and tear. For valid claims‚ repairs or replacements are provided at the manufacturer’s discretion. This warranty underscores Wildgame Innovations’ commitment to quality and reliability.
Contacting Customer Support
For assistance with your Wildgame Innovations trail camera‚ contact customer support via phone or email through their official website. Provide your camera’s serial number and a detailed description of the issue for efficient troubleshooting. Representatives are available to address queries about warranty claims‚ technical issues‚ or general inquiries. Ensure to reach out through authorized channels to verify the legitimacy of support and receive accurate guidance for resolving your concerns promptly and effectively.
Authorized Dealers and Service Centers
Ensure authenticity and warranty by purchasing from authorized Wildgame Innovations dealers. These dealers offer genuine products and reliable service. Visit the official website or contact customer support for a list of authorized retailers. This guarantees your purchase is protected and you receive proper assistance when needed.
Mastering your Wildgame Innovations trail camera ensures reliable performance and exceptional wildlife monitoring. Follow these instructions to maximize its potential and enjoy seamless outdoor surveillance experiences.
Final Tips for Effective Trail Camera Use
- Position the camera at a 45-degree angle to the target area for optimal coverage.
- Ensure the surrounding area is clear of debris to avoid false triggers.
- Avoid direct sunlight on the IR sensors to prevent overexposure.
- Use high-quality SD cards for reliable performance and storage.
- Regularly check storage capacity and battery levels.
- Conserve battery life by adjusting sensitivity and video length settings.
- Maintain your camera with periodic cleaning and updates for long-term durability.
Maximizing the Potential of Your Wildgame Innovations Trail Camera
To get the most out of your Wildgame Innovations trail camera‚ ensure proper placement‚ adjust settings to suit your environment‚ and maintain regular checks. Optimize image quality by positioning the camera at the right height and angle. Experiment with sensitivity and trigger speed for better wildlife detection. Utilize external power options for extended use in the field. Stay informed about storage capacity and battery life to avoid missing critical captures. Explore advanced features like time stamps and multi-shot modes for detailed wildlife insights. Regular updates and maintenance will ensure your camera performs at its best for years to come.
Leave a Reply
You must be logged in to post a comment.